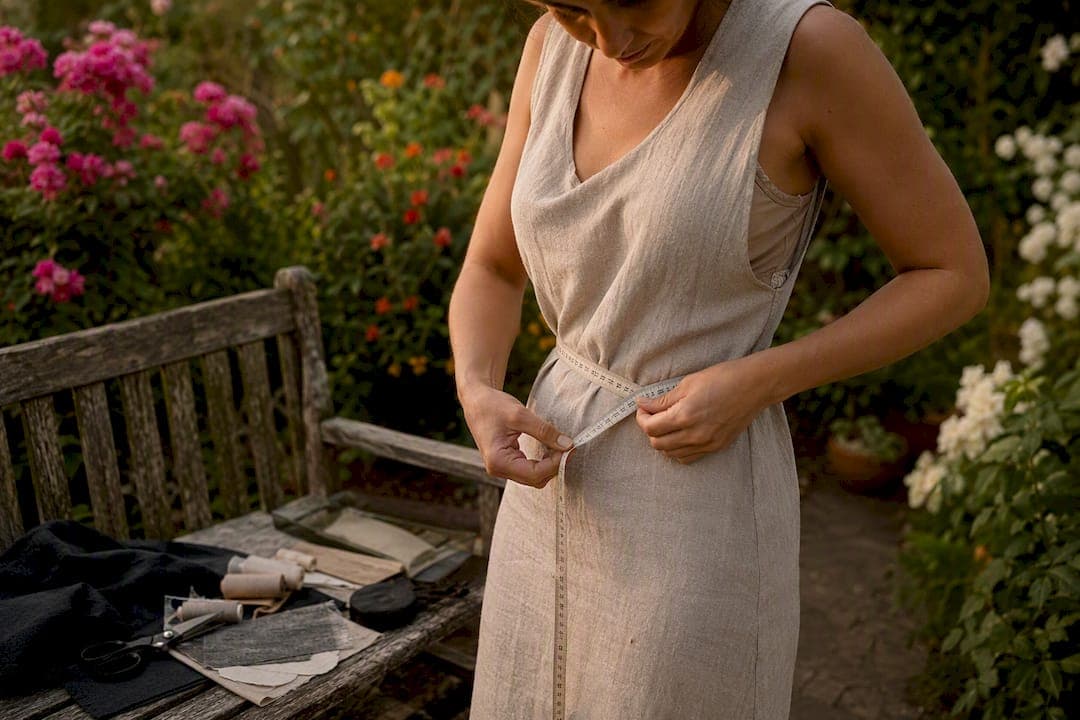
Four numbers make or break a custom dress: full bust, natural waist, full hip, and hollow-to-floor. Get these right and everything else, from bodice shaping to hemline, follows. The single best way to capture them is with a soft measuring tape, thin fitted undergarments (or the actual bra you plan to wear with the dress), an elastic tied at your natural waist, a helper standing behind you, and every measurement taken twice for consistency.
- Full bust: around the fullest part of your chest, tape parallel to the floor
- Natural waist: at the crease that forms when you bend gently to the side
- Full hip: around the widest point, usually 7 to 9 inches below your waist
- Hollow-to-floor: from the neck hollow to the floor, barefoot first
If your gown calls for heels, note that heel height separately. Some dress measurements, like shoulder width or bicep circumference, only get requested for structured bodices or fitted sleeves, so don't worry about them yet.
Key Takeaways
Accurate custom dress sizing comes down to four core measurements, consistent posture, a helper for hard-to-reach spots, and a written record your dressmaker can trust.
| Point | Details |
|---|---|
| Four core numbers | Full bust, natural waist, full hip, and hollow-to-floor form the foundation of any custom order. |
| Use an elastic marker | Tie elastic at your natural waist and leave it on through the entire measuring session. |
| Measure twice, record once | Take each measurement two to three times and write down the most consistent reading. |
| Size up when in conflict | If your bust, waist, and hip point to different sizes, choose the larger number, especially in non-stretch fabric. |
| Record conditions, not just numbers | Note undergarments, shoe height, and standing versus seated for each measurement. |
| Shop with your chart | Senanukunu's dress collection includes fit notes and support access to match your measurements to the right piece. |
Table of Contents
- How to Measure for a Custom Dress, Step by Step
- What Does Each Measurement Actually Control?
- Common Measuring Mistakes and Quick Fixes
- Extra Measurements for Sleeves, Straps, and Structured Bodices
- What Studio-Trained Fitters Get Right About Posture and Tools
- How to Take Seated Measurements for Dresses Built to Be Worn Sitting
- How to Record and Organize Your Measurements for Accuracy
- How to Communicate Your Measurements to Your Dressmaker
- Measuring Children or Non-Standard Body Types
- Why Precision Matters More on Handcrafted Pieces
- Bring Your Measurements to Sena Nukunu
- Frequently Asked Questions
- Sources
How to Measure for a Custom Dress, Step by Step
Getting an accurate read starts before the tape ever touches your skin. Gather a soft cloth or vinyl tape (never a stiff hardware-store version), a full-length mirror, a length of thin elastic, the shoes you'll wear with the dress, your phone, and a helper if one is available. Wear thin, fitted undergarments, ideally the exact bra you intend to wear on the day, since padding and structure change your bust number by a full size in either direction.
Tie the elastic around your natural waist before you start and leave it there for the entire session. This keeps every vertical measurement, from underbust to hip, anchored to the same reference point instead of drifting as you move around.
- Full bust. Wrap the tape around the fullest part of your chest, straight across your shoulder blades, parallel to the floor. Breathe normally; don't inhale or suck in.
- High bust (if your dressmaker requests it). Measure just above the bust, under the arms and across the back.
- Underbust. Measure directly beneath the bust, where a bra band sits.
- Natural waist. Bend gently to one side; the crease that forms marks your natural waist. This is where your elastic marker should already be sitting.
- High hip. Measure about 2 to 3 inches below your natural waist, useful for fitted or dropped-waist silhouettes.
- Full hip. Measure around the fullest point of your hips and seat, keeping the tape level all the way around.
- Hollow-to-floor. Have your helper measure from the small hollow at the base of your neck straight down to the floor. Do this barefoot first, then record your intended heel height as a separate number.
- Shoulder-to-waist and back length (only for structured or fitted-bodice styles). Measure from the top of the shoulder down to your marked waistline, then from the base of the neck straight down the spine to the same point.
Keep your posture identical for every single measurement. Stand tall, look straight ahead rather than down at the tape, and distribute your weight evenly on both feet.
Pro Tip: Take each measurement twice. If the two readings differ by more than a quarter inch, take a third and use whichever number repeats. A single rushed pass is where most sizing errors sneak in.
What Does Each Measurement Actually Control?
Every number you record does a specific job in the final garment, and knowing which one matters most helps you resolve conflicts before they become alterations.
- Bust shapes the bodice, the neckline, and where the cup or dart sits. Full-bust and high-bust are two different numbers. Full bust captures the widest point of your chest, while high bust measures above it, and a dressmaker uses the gap between them to judge cup volume, not just overall chest size.
- Waist anchors the entire silhouette. Whether a dress nips in sharply or skims loosely, the waistline position starts from your natural waist, which is why the elastic marker matters so much.
- Hips need to be measured at their fullest point, no matter where that falls, because a hip measurement that's too tight restricts walking, sitting, and stairs in a way a slightly loose one never will.
- Hollow-to-floor sets your hem and train length. Record it both barefoot and with your intended shoe height, because a 3-inch heel shifts hem placement by roughly 3 inches.
Most formal dresses are built from these four core numbers, and accurate ones are directly tied to fewer alterations and fewer returns. When your bust, waist, and hip measurements land you in different standard sizes, choose the larger one. It's far easier for a skilled hand to take in a seam than to add fabric that was never cut.
Common Measuring Mistakes and Quick Fixes
Most fit problems in custom dresses trace back to a handful of avoidable habits, not bad luck.
- Skip compressing sports bras or heavy shapewear unless you'll actually wear that exact piece under the dress, since it can shrink your true bust and waist by an inch or more.
- Don't cinch the tape tight or look down while reading it. Both distort the number and throw off your posture for the next measurement.
- Measure each area two to three times and trust the most consistent reading, not the first one.
- Write down exactly what you wore, bra type and shoe height included, alongside the numbers themselves.
- When you fall between two sizes, especially in non-stretch fabric or heavily beaded and embellished pieces, size up. Structured fabric has little give.
Pro Tip: Measure at the same time of day if you're spreading the process over multiple sessions. Bloating and fatigue can shift your waist and hip numbers by a half inch between morning and evening.
Extra Measurements for Sleeves, Straps, and Structured Bodices
Some silhouettes need more than the four essentials. Fitted sleeves, corset backs, and off-shoulder necklines all pull in extra numbers your dressmaker will ask for directly.
- Shoulder width: measure tip to tip across the back, following the natural slope of the shoulders.
- Sleeve length: from shoulder tip to wrist, with your arm bent slightly at the elbow, since a straight arm shortens the number.
- Bicep and wrist circumference: wrap the tape at the fullest point of the upper arm and around the wrist bone.
- Shoulder-to-waist and center-back length: essential for fitted bodices, corseted backs, and any style with a defined waist seam.
A helper is close to mandatory here. Back and shoulder measurements are nearly impossible to get accurately solo, since you can't see the tape and hold your posture at the same time.
What Studio-Trained Fitters Get Right About Posture and Tools
Posture consistency separates a usable measurement from a guess. Looking down at the tape or shifting your weight mid-measurement changes both length and circumference readings, which is why studio fitters train themselves to look straight ahead and keep their stance identical from the first number to the last.
Your tools checklist should include a soft measuring tape, an elastic waist marker, a full-length mirror, the shoes you'll wear with the dress, and your phone for photographing yourself front and side.
A soft cloth or vinyl tape and a full-length mirror are the two non-negotiables. Photograph your measurements from the front and side so your maker can verify placement against what you recorded.
Senanukunu's own fitting guide for celebration dressing walks through the same posture and recording habits in more depth, and our team is always available to double-check a measurement before you order.
How to Take Seated Measurements for Dresses Built to Be Worn Sitting
Some occasions, think reception gowns, event wear you'll spend hours seated in, or dresses with structured boning, need measurements taken while seated, not just standing. Standing numbers alone can leave a seated bodice gaping at the waist or pulling tight across the hips.
Sit upright on a firm, flat chair with your feet planted and your back straight, not slouched against the chair back. Measure your seated waist and hip circumference the same way you would standing, keeping the tape level and parallel to the floor. Then measure your torso length seated, from the base of your neck down to the chair seat, since this number tells your dressmaker how much fabric needs to stretch or ease when you sit rather than stand.
If the dress includes a fitted bodice or boning, also measure your seated bust-to-waist distance, since sitting compresses the torso and shortens this measurement compared to standing. Skipping this step is one of the more overlooked custom dress sizing tips, and it's the reason some perfectly fitted standing gowns feel tight the moment you sit down at dinner.
Take seated measurements with a helper whenever possible. Twisting to read a tape while seated distorts your posture in ways that are hard to notice in the moment, and a second set of hands keeps the tape level and the reading accurate on the first try.
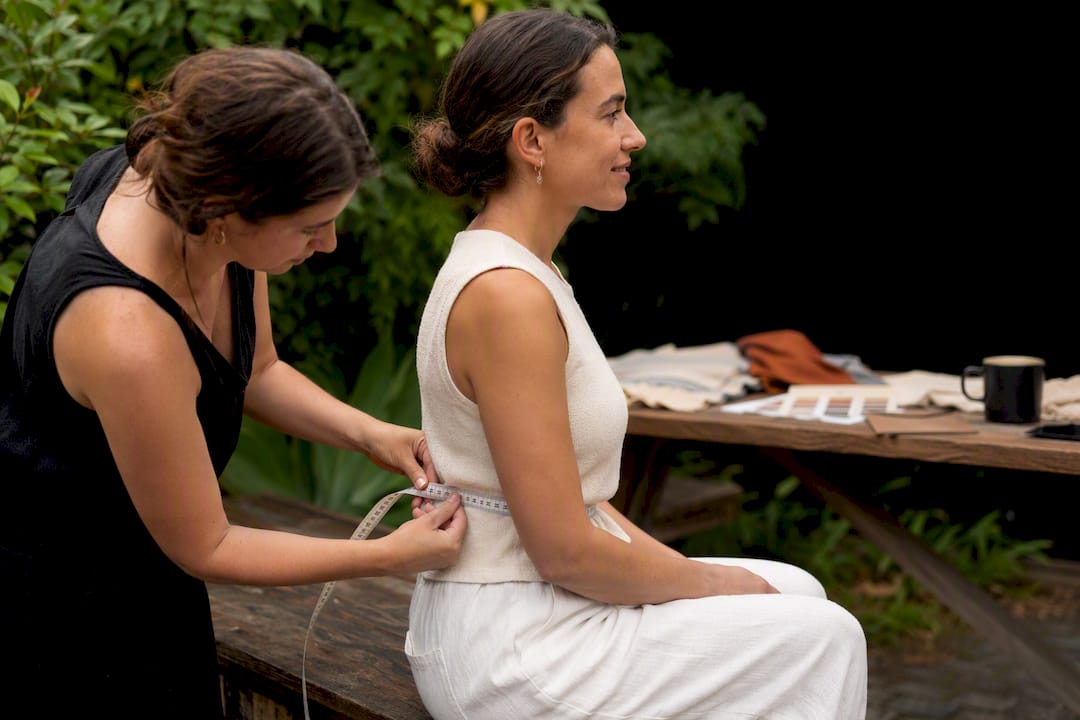
How to Record and Organize Your Measurements for Accuracy
A measurement is only useful if it survives the trip from your bedroom to your dressmaker's worktable intact. Write every number down immediately, not from memory later, using a simple chart with three columns: the measurement name, the number in inches, and any notes about what you were wearing.
Group your notes into three categories: core measurements (bust, waist, hip, hollow-to-floor), extras (shoulder, sleeve, bicep), and conditions (bra type, shoe height, seated versus standing). This structure mirrors how most custom dressmaker order forms are built, so filling one out later takes minutes instead of guesswork.
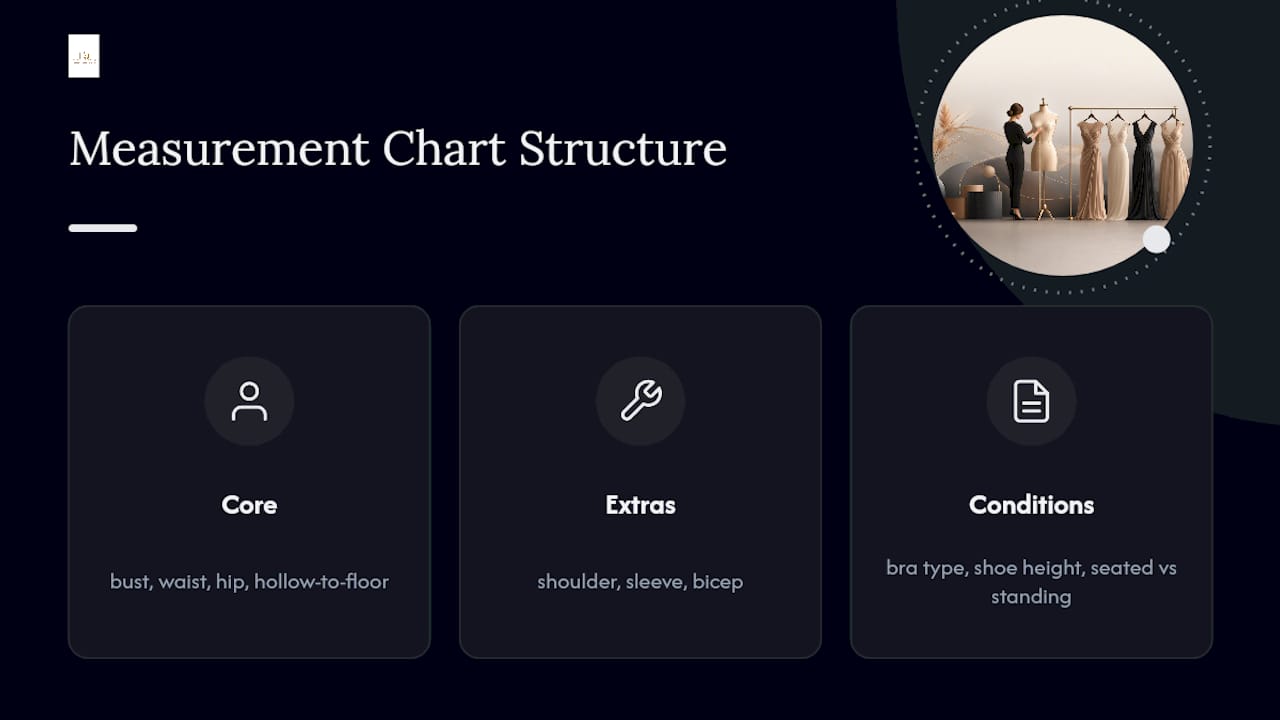
Documenting the undergarments and shoes you wore while measuring lets your maker reproduce the exact same baseline weeks later if an adjustment is needed, rather than asking you to remeasure everything from scratch.
Photograph yourself front and side in fitted clothing at the same time you take your measurements, and store both the photos and the numbers together in one folder on your phone. Date the entry. Bodies shift with seasons, life changes, and time, and a measurement chart from eight months ago may no longer match your current numbers, especially around the waist and hip.
How to Communicate Your Measurements to Your Dressmaker
Numbers alone only tell half the story. A dressmaker needs to know not just what your body measures, but what kind of fit you're picturing, since body measurements and garment ease are two separate pieces of information that both shape the final pattern.
When you send your measurement chart, include a short note describing the fit you want: fitted through the bodice, relaxed through the hips, or fully loose and flowing like a kaftan. Mention any reference garment you own that fits the way you want the new piece to fit. That single sentence often clarifies more than an extra half inch of measurement ever could.
Send your photos alongside the numbers. A front and side photo in fitted clothing helps a maker cross-check your chart against your actual proportions and catch a transposed number before it becomes a cutting error.
If you're ordering a flowing style, mention it explicitly. Amana's sizing guidance for kaftans and jalabiyas recommends extra ease of several inches beyond the body measurement for comfortable drape, and a structured gown needs the opposite treatment entirely. Naming the silhouette upfront saves a round of back-and-forth questions later.
Measuring Children or Non-Standard Body Types
Kids fidget, and that single fact changes the entire measuring approach. Break the session into short bursts rather than one long sitting, measure the essentials first (bust or chest, waist, hip, and length), and skip the extras unless the garment truly needs them. A snack break between measurements works better than asking a seven-year-old to hold still for ten minutes straight.
For non-standard proportions, whether that means a significant difference between your waist and hip measurements, a shorter or longer torso relative to your height, or asymmetry between your left and right side, take every measurement on both sides of the body when relevant and record both numbers rather than averaging them. A dressmaker working from an average can end up with a garment that fits neither side well.
If you use a wheelchair or measure seated as your standard posture, follow the seated measurement steps above as your primary chart rather than a supplement to standing numbers. Note your seated hip and waist circumference, plus your torso length from neck to seat, as the core figures your dressmaker builds from.
Whatever your body type, the same rule from earlier applies: a helper makes back, shoulder, and vertical measurements dramatically more reliable than working solo, and that's doubly true when the person being measured can't hold a single position for long.
Why Precision Matters More on Handcrafted Pieces
A machine-cut dress off a rack forgives a lot. A handcrafted piece, built one at a time from your exact numbers, doesn't have that cushion, which is why we ask for a recorded measurement chart rather than a quick estimate. Flowing kaftans can carry generous ease and still drape beautifully, while structured gowns need numbers precise to the quarter inch. When in doubt, our fit resources and support team are one message away.
Bring Your Measurements to Sena Nukunu
Once your chart is filled out, put it to work. Senanukunu offers curated, handcrafted dresses rooted in West African heritage, each piece made in limited quantities with fit guidance built into every listing, and custom adjustments available where a style calls for them.

Browse our dress collection with your recorded bust, waist, hip, and hollow-to-floor numbers in hand, and check the fit notes on pieces like the Solara Tide midi dress against your own chart before you order. If you're eyeing something with more drape, our embroidered kaftan styles show how flowing silhouettes wear differently than fitted ones. Unsure which size your numbers point to, or whether a piece needs a custom adjustment? Message our support team with your chart attached and we'll help you land on the right fit before you check out.
Frequently Asked Questions
What are the minimum measurements needed to order a custom dress?
Full bust, natural waist, full hip, and hollow-to-floor cover the essentials for most formal and everyday custom dresses. Structured bodices, fitted sleeves, or corset backs may require additional numbers like shoulder width or sleeve length.
How do I measure my bust for a dress if I'm unsure which bra to wear?
Wear the bra you actually plan to wear with the finished dress, since padding and band structure can shift your bust measurement by a full size. If you haven't chosen one yet, a thin, unpadded, well-fitted bra gives the most reliable baseline number.
Can I measure myself accurately without a helper?
You can capture bust, waist, and hip measurements solo with practice, but hollow-to-floor, shoulder width, and back length are far more reliable with a second person, since you can't hold a tape steady and check a mirror at the same time.
What if my measurements fall between two standard sizes?
Choose the larger measurement, particularly for non-stretch fabrics or heavily embellished pieces where a seam has little room to expand. It's always easier to take a garment in than to add fabric after the fact.
Do I need different measurements for a kaftan versus a fitted gown?
Kaftans and other flowing silhouettes typically add several inches of ease beyond your body measurements for comfortable drape, while fitted gowns are cut close to your exact numbers. Mention the silhouette you want when you send your chart so the maker adds ease appropriately.
Sources
- How to take dress measurements at home | The Knot
- How to take wedding dress measurements at home | Studio RÉN
- How to measure for a dress: 2026 guide | 27dress